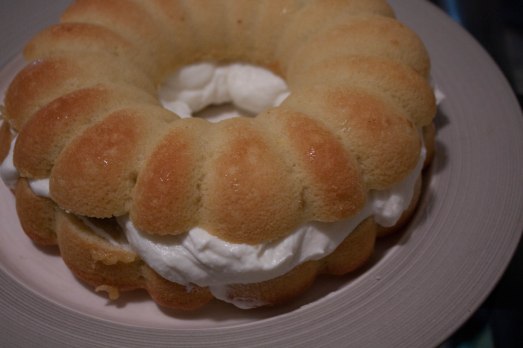
Gingerbread Bundt Cake

IMG_0020

Bundt cakes are such funny cakes. As I was making the bundt cake, I began to question who was the wise man that made such a fun shaped cake tin. Well, I still don’t know who that person was. What I do know, is that the bundt cake is based on a traditional European cake but was popularized in the US in the ’50s and ’60s.

This cake was made for both Alphabakes and Tea Time Treats, with Alphabakes’s giving me the letter G this month (so ginger!) and Tea Time Treats’s having a free for all.

This bundt actually seemed more breakfasty to me than anything, so it has provided me a week’s worth of breakfast. It’s pretty dense, but the flavor is great and gingery with a bit of citrus!

Gingerbread Bundt Cake
(original source)

Ingredients
3 cups all-purpose flour
1 tsp baking soda
1 tsp baking powder
1/2 tsp salt
2 tbsp ground ginger
2 tsp ground cinnamon
1 tsp ground nutmeg
1/2 cup vegetable oil
3/4 cup brown sugar
1/3 cup maple syrup
4 large eggs
1/2 cup plain yogurt
1 cup milk
1 tsp vanilla extract
ORANGE GLAZE:
1 cup powdered sugar
1 tsp orange zest
3 tbsp milk

Directions

  1. Preheat oven to 350 and grease a bundt tin.
  2. In a medium sized bowl, sift together the flour, baking soda, baking powder, salt, ginger, cinnamon, and nutmeg.
  3. In another bowl, beat together the vegetable oil, sugar, syrup, eggs, yogurt, milk, and vanilla.
  4. Fold the dry ingredients into the wet ingredients. Pour into the bundt tin.
  5. Bake for 60 minutes.
  6. Remove the bundt from the oven and let cool. Then remove from the tin and cool longer.]\
  7. In another bowl, mix together the ingredients for the glaze. I prefer the glaze to be thinner. If you want it thicker, add less milk.
  8. Pour the glaze over the cake.

AlphaBakes Logo TeaTimeTreats DDT-button-new2015-175

Szilvas Pite (Plum Cake)

IMG_9759

Well… Looks like something got into this cake before I could take a picture of it. I can’t blame anyone, because imagine this. Plum cake topped with vanilla ice cream? It’s too hard to resist. I wish I had more left actually, because my mouth is watering just thinking about it.

The downsides of this? I clearly didn’t sprinkle the sugar/cinnamon mixture on top of it very evenly. I actually had forgot. And then tried to do it while the cake was in the oven. That wasn’t my best baking moment.

This cake, or szilvas pite, is a Hungarian desert. I got the recipe from Saveur, which also included an article from 2013 by Carolyn Banfalvi, about Hungarian cuisine.

“I was getting full, but, wait, there was dessert: szilvás pite, a sheet cake dotted with fresh plums that we chased with strong black coffee . . . I make szilvás pite, reveling in the way the tart, juicy ripe plums from the market meld with the tender sheet cake.”

My plums sunk, perhaps I should have used a bigger baking dish to make it less thick? But I really liked the density of the cake. Despite the sunk plums, the taste was so perfect. Not too sweet, but the taste of the plums made it divine. And my plums were fresh from the farmers’ market. Even better.

F1 Foods 1

I made this recipe for Caroline from Caroline Makes . . . fun food challenge called Formula 1 Foods, following the Formula 1 Grand Prix foodie style.

Szilvas Pite

Ingredients
1/2 cup all-purpose flour
1/2 tsp baking powder
1/4 tsp kosher salt
1/2 cup sugar, plus 1 tbsp sugar separated
1 egg
1/2 cup Greek yogurt
2 tbsp vegetable oil
1/2 tsp almond extract
4 ripe plums, halved and pitted
1/8 tsp ground cinnamon

Directions

  1. Heat oven to 375. Grease a round cake tin and set aside.
  2. Whisk flour, baking powder, and salt in a bowl.
  3. In another bowl whisk together 1 cup of sugar and the egg. Then mix in the yogurt, vegetable oil, and almond extract.
  4. Slowly combine the dry mixture to the wet mixture. Mix with a wooden spoon, making sure that the batter is thoroughly mixed.
  5. Pour the batter into your tin. Arrange the plums, cut side down, over the cake batter.
  6. Combine the sugar and cinnamon in a small bowl. Sprinkle over the cake batter.
  7. Bake for 50 minutes. Remove from the oven and let cool before serving.

Deep Dark Chocolate Cake

photo (1)

This month, Random Recipes and We Should Cocoa banded together to create a wonderful challenge. Randomly pick a cookbook and randomly pick a recipe from said cookbook that uses . . . you guessed it! CHOCOLATE!

Somehow, despite being random, I keep picking my favorite cookbook off the shelf. Either I just need more cookbooks to be randomly selected or there’s some sort of magnetism that keeps this book coming back to me. Welcome again my favorite cookbook, Cook Yourself Thin. In the past, for Random Recipes I’ve made the Mediterranean Chicken and Better For You Breakfast Sandwich.

Anyway, once I was holding this cookbook, I counted the number of recipes in it that used chocolate. I then put into the random number generator and was directed to this chocolate cake. I was pretty happy when I saw what recipe the generator had chosen for me, since my boyfriend’s birthday is in February (today actually) and he had asked for a chocolate cake.

This cake was sort of dry, but he raved over and over that he hates moist cakes and was so happy because he likes dry cakes and no one ever makes dry cakes. While I personally like moist cakes a hell of a lot, the lack of butter does take away a lot of the moist in a cake. Additionally, he likes it when I accidentally overcook things, so a dry cake really was the way to go for him. All in all, it was a success. The beets were such a strange addition, but in the end, you don’t even taste them.

This was a great random recipe. The universe was aligned when I randomly chose this recipe!

9941_10101155105151878_524169774_n

And with that, I’d also like to wish my love a very happy 31st birthday!

randomrecipes2We_Should_Cocoa_V3

Deep Dark Chocolate Cake

Ingredients

FOR THE CAKE
1 1/2 cups flour
3 1/4 tsp baking soda
1/2 + 1/8 tsp salt
1/4 cup finely ground cashews
5 tbsp cocoa powder
4 oz beets, peeled and finely grated
4 oz buttermilk
2 tbsp brewed black coffee
3 eggs
3/4 cups sugar

FOR THE ICING
1/2 cup chocolate chips
2 tbsp brewed black coffee
2 tbsp honey

Directions

1. Preheat the oven to 350. Spray an 8″ springform baking pan with cooking spray.

3. In a small bowl, combine the flour, cocoa powder, ground cashews, salt, and baking soda together. Set aside.

4. In a mixer, beat the eggs and sugar for 4 minutes using medium speed, until pale and fluffy. On low speed, beat in the beets followed by the dry ingredients. Add the buttermilk and coffee and beat until the batter is smooth.

5. Pour the batter into the springform pan. Place in the middle of a hot oven and bake for 30 minutes. Your cake is done with a toothpick stuck in the middle comes out clean.

6. Cool for 10 minutes then unmold and set on a cooling rack. Cool until the cake is cold.

7. To make the icing, prepare a double broiler. Combine all the icing ingredients and stir gently, until the chocolate is smooth. Stir until the chocolate mixture thickens.

9. Pour the icing over the top of the cake and allow it to drip down the sides.

* I’m also sharing this recipe with Mix It Up Monday

Ricotta Sponge Cake

IMG_8963


This month Dom and his Random Recipes challenged food bloggers to use a random number generator to pick a random cookbook off the shelf and open it randomly to a page and cook the first recipe seen when the book is opened. The random number generator landed on number 23 for me, which coincidentally was the newest book on my shelf: Stephanie Alexander & Maggie Beer’s Tuscan Cookbook.

I actually had to open the book twice before I even got a recipe to make. The book is filled to the brim with beautiful pictures of food and culture. The first two times I opened the book I was face to face with beautiful pictures, but no recipes to accompany them. On the third flip open, I was presented by the Ricotta Sponge Cake.

Unfortunately, I had to end up throwing my cake away. I’m not blaming the cookbook though, because everything in the cookbook was perfect. The problem lays with my own decision making skills in the kitchen. Rather than just buying a premade sponge cake, I decided to make my own. The problem is, I am notoriously a failure at whipping up egg whites. I don’t know why I fail as bad as I do with this, but I can try to blame it on the fact that right now it’s pretty hot out and the whites just weren’t at the right temperature. Whatever it is, my stupid sponge cake ended up tasting similar to scrambled eggs and that just turned me off horribly, so I scraped the ricotta cream into my mouth and threw the eggy cake away.

Had I just surrendered and bought the sponge cake from the grocery store to begin with, this would have been a wonderful dessert. The cream was cheesy but sweet, silky, creamy, and just utterly delicious. It was especially delicious with the blueberries I had layered on top of the cream. I ruined it though with my stupid scrambled egg failure of a cake.

I need a lesson in beating egg whites.

Ricotta Sponge Cake

Ingredients
1 cup ricotta
1/2 cup plain  yogurt
1/2 cup heavy cream
sugar, to taste
sponge cake
blueberries

Directions

1. In a food processor, blend the ricotta until smooth. Add the yogurt and blend until well combined with the ricotta.

2. In a mixer, beat the heavy cream until whipped cream is formed. Add sugar to taste. Fold the whipped cream into the ricotta mixture.

3. Slice a sponge cake in half. Spread the ricotta mixture on the bottom half of the cake. Place blueberries on top. Replace the top half of the cake.

randomrecipes2

Thanksgiving 2012


After I uploaded my pictures I realized this photo was preemptive – I forgot to put the turkey on my plate! I didn’t actually go turkeyless though, so everything is right in the universe. For Thanksgiving I am at my parents’ house. I wasn’t responsible for all the dishes and will only be sharing the recipes for what I actually made. But our dinner consisted of:

– Turkey
– Bread
– Sauteed green beans
– Twice baked potato
– Roasted winter vegetables
– Stuffing
– Cranberry
– Biscoff pumpkin cheesecake
– Chocolate pecan pie

It was all great.

The first dish I was responsible for was the roasted winter vegetables. Last week at work we had a potluck and someone brought something similar to this. After having it at work, I knew I needed to make this at our own Thanksgiving because it was such a nice accompaniment to an otherwise heavy meal.

Roasted Winter Vegetables

Ingredients
3 beets
1/2 butternut squash
4 yams
1 fennel root
2 tbsp sage, chopped
1 tbsp rosemary, chopped
1 tbsp olive oil

Directions

1. Preheat your oven to 400. Chop all the vegetables into cube sized pieces. Combine in a baking dish.

2. Add the olive oil, sage, and rosemary to the roasted vegetables. Toss with your hands.

3. Place in the preheated oven for about an hour and a half, until soft. Check every half hour and stir.

* serves about 14

Naturally I was also responsible for a dessert. While searching the web recently I found this recipe for a biscoff pumpkin cheesecake. On foodie penpals biscoff spread seems to be making its way through the boxes, so I decided that it must be good and I should try it. The biscoff spread is crazy good. Basically you’re eating the creamed version of the biscoff cookie. It’s hard to fathom such a thing even exists!

The cheesecake was a huge success and very loved at dinner. I think the cheesecake is one of the best Thanksgiving desserts. You make it the day before and all you have to do is cut it on Thanksgiving day.

Biscoff Pumpkin Cheesecake

Ingredients

CRUST
30 biscoff cookies, ground into crumbs
1/4 cup melted butter
3 tbsp brown sugar

CHEESECAKE
24 oz cream cheese, room temp
2 cup fresh roasted pumpkin, mashed
3 eggs, room temp
1 egg yolk, room temp
1/4 cup sour cream, room temp
1 tsp vanilla
1 1/2 cups sugar
2 tbsp flour
1 1/2 tsp cinnamon
1/2 tsp ginger
pinch nutmeg
pinch cloves
1/4 tsp salt
1/4 cup biscoff spread, melted

Directions

1. `Preheat your oven to 350. First make your crust. In a bowl combine the cookie crumbs, melted butter, and brown sugar. In the bottom of a springform pan, pour the crumb mixtures. Press against the bottom of the pan and up the sides. Place in the refrigerator for 10 minutes. Remove and bake for 10 minutes. Let cool.

2. Next, make the cheesecake. Beat the cream cheese until smooth, for about 5 minutes. Mix in the pumpkin and beat until smooth. Add the eggs and egg yolk, one at a time until incorporated. Beat in the sour cream and vanilla until just combined.

3. In a small bowl combine the sugar, four, cinnamon, ginger, nutmeg, cloves, and salt. Pour this mixture into the cream cheese and stir together well.

4. Pour your cheesecake filling into your cooled crust. Pour the melted biscoff spread on top of the cheesecake randomly and swirl with a knife.

5. Wrap the springform pan in several layers of aluminum foil. Put the pan in a roasting dish. Boil water and fill the roasting dish so that the water comes about half way up on the pan. Place the roasting dish in the oven and bake for 1 hour and 40 minutes, until the top is brown and the cheesecake is puffy.

6. Let sit out and bring to home temperature. Once cooled, cover and put in the refrigerator for at least 4 hours.

I hope everyone had a great Thanksgiving!

* shared with Sweet Treats and Swanky Stuff Saturday & Weekend Cooking

Upside Down Asian Pear Cake

At the farmers’ market this weekend it became clear that Asian Pears are quite in season. I decided to get a bag and bake something with them. I’ve never made an upside down cake before, so this was new to me. I always thought the process must be soooo difficult. I’m glad I was wrong! It was so easy, but so yummy.

Upside Down Asian Pear Cake
(source)

Ingredients
1 or 2 big Asian pears, peeled and sliced
2 1/4 cup sugar
1/3 cup water
6 tbsp unsalted butter
2 eggs
1/4 cup sour cream
1 tsp vanilla
1 1/4 cups flour
1/8 tsp salt
1 tsp baking soda
1 lemon, zested

Directions

1. Butter an 8-inch baking pan. Arrange the pears in a single layer in the pan. Cook 3/4 cup of sugar and water together on high heat until it becomes a light brown caramel. Pour the caramel over the pears and set aside.

2. Preheat the oven to 325.

3. Cream butter and the rest of the sugar (1/2 cup) until light and fluffy. Add in the eggs, one at a time until well combined.

4. Add in the lemon zest, sour cream, and vanilla. Mix well. Sift flour, baking powder, and salt and add to the mixture. Mix until well combined.

5. Pour the batter evenly over the pears. Bake for 30-40 minutes, until a tester comes out clean.

6. Cool the cake for 10 minutes and then flip the cake out of the pan onto a clean plate.

* Shared with What’s Cooking Wednesday

Strawberry Mint Chocolate Layered Mousse Cakes

Every month I try to participate in the baking challenge at BakeBakeBake at Livejournal. This month’s challenge theme was LAYERS. After racking my brain and surfing the web, I decided to make a layered mousse cake. After several days of contemplating flavors, I decided to make a chocolate cake topped with white chocolate mint mousse and strawberry mousse. They’re kind of messy looking, but being I’ve never worked with mousse in this capacity before and I was having a damned hard time getting the tubes made of wax paper to be straight and cylindrical, I am very proud of how these came out.

They tasted delicious.
It took me a total of three days to finish, but it was worth it.

Strawberry Mint Chocolate Layered Mousse Cakes

Ingredients

FOR THE CAKE
1/3 cup all-purpose flour
2 1/2 tbsp cocoa powder
1/3 cup sugar
1/4 tsp baking soda
1/2 tsp baking powder
1/8 tsp kosher salt
1/2 egg
2 tbsp milk
1 1/2 tbsp vegetable oil
1/4 tsp vanilla extract

FOR THE WHITE CHOCOLATE MINT MOUSSE
9 oz white chocolate chips
1 cup heavy cream
1 egg white
1/4 tsp peppermint extract

FOR THE STRAWBERRY MOUSSE
3/4 cup heavy cream
6 tbsp strawberry puree
1 tsp gelatin
3 tbsp cool water

Directions

FOR THE CAKE

1. Preheat the oven to 350. Place 3 ramekins on a baking sheet and coat with cooking spray. Set aside.

2. Stir flour, cocoa powder, sugar, baking soda, baking powder, and salt in a large bowl. Add egg, milk, vegetable oil, and vanilla extract. Beat in a stand mixer until well combined.

3. Divide the batter equally between the 3 ramekins.

4. Bake for about 20 minutes, or until the cake is cooked all the way through. Allow to cool before preparation.

 FOR THE WHITE CHOCOLATE MINT MOUSSE

1. In a double boiler melt the white chocolate chips. Stir gently occasionally. Once melted, set aside and allow to cool.

2. In the bowl of the stand mixer whip together the cream, egg white, and peppermint extract until you have created soft peaks.

3. Gently fold the cream into the melted white chocolate.

FOR THE STRAWBERRY MOUSSE

1. Bring the strawberry puree to a boil. Remove from heat and cool.

2. In a small bowl fill with the cool water. Top with the gelatin. Allow the gelatin to bloom.

3. Meanwhile, beat the heavy cream until soft peaks form.

4. Heat the gelatin over simmering water. Remove from heat and stir into the strawberry puree.

5. Fold the strawberry mixture into the cream.

TO PREPARE THE CAKES

1. Once your cakes have cooled and have been removed from the ramekins, wrap them in wax paper to create a tube. (I should have taken a picture of this step, but I didn’t. Here’s a picture from Sugar For The Brain to demonstrate.)

2. In a pastry bag or a ziplock bag with the corner cut off, divide the white chocolate peppermint mousse between the three cakes, squeezing the mousse into the wax paper tubes. Smooth and place in the refrigerator for about an hour.

3. In a pastry bag or ziplock bag with the corner cut off, divide the strawberry mousse between the three cakes, squeezing the mousse into the wax paper tubes. Smooth and place in the refrigerator for about an hour.

* serves 3
* Besides BakeBakeBake, I’m sharing this recipe with The Recipe Box 

Spiced Apple Coffee Cake

Here’s a random factoid about me: When I’m stressed I bake. This is a habit I developed during undergrad. Back then it worked out really well. I lived in this huge house that had seven of us in it. Half of the housemates were boys. I could bake something during a moment of stress, eat one piece of whatever it was I made, and then not have to worry about shoving the rest of the treat in my face. The boys that I lived with loved when I was stressed because it meant they could guarantee snacks. Sometimes I’d even come into the kitchen, feeling overwhelmed, and there’d be a cookbook already opened to a page of what someone in the house was desiring.

Like I said, it worked well for everyone. I graduated from college without going into a sugar coma.

Law school however is proving differently. Despite losing a great deal of weight, I am having a harder time resisting my goodies. I don’t want to feed them all to my boyfriend, because well.. He doesn’t really need them. I have contemplated bringing them in to work, but I don’t know why that hasn’t actually happened yet.

Anyway, one thing I’ve found is that if I bake something solely for breakfast and eat it only for breakfast, things are a little more in control.
This apple cake was absolutely delicious. I made it last all week by having a piece for breakfast. Despite it not getting eaten in the course of 24 hours, it stayed surprisingly moist.

My landlord has since brought me fresh pears over and this weekend I’m going to make a pear version of this cake. I’m also making brownies, but that’s a different story.

Spiced Apple Coffee Cake

INGREDIENTS

for the cake..
1 3/4 cups all-purpose flour
1 1/2 tsp baking powder
1/4 tsp kosher salt
3 apples, peeled, cored, and cut into cubes
2 tbsp apple cider vinegar
1/3 cup packed brown sugar
1 1/2 tsp ground cardamom
1 tsp ground cinnamon
8 tbsp unsalted butter, at room temperature
8 oz cream cheese, at room temperature
1 1/2 cups white sugar
1 tsp vanilla extract
2 eggs

for the glaze..
3/4 cup powdered sugar
3 tbsp sweetened condensed milk
1/2 tsp vanilla
1 tbsp water

DIRECTIONS
1. In a medium bowl mix together the flour, baking powder, and salt. Set aside.

2. In another bowl combine the apples, the vinegar, the brown sugar, cardamom, and cinnamon. Toss to combine and set aside.

3. In a bowl of a stand mixer beat the butter, cream cheese, and sugar until creamy. Add the eggs, one at a time scraping down the sides of the bowl regularly. Add the flour in three additions and beat until smooth. Using a rubber spatula fold the apples into the batter. Spoon the batter into a springform pan that has been sprayed with Pam.

4. Bake in an oven set to 350 for 1 hour or until a toothpick inserted in the middle of the cake comes out clean. Transfer the pan to a wire rack and let cool for 5 minutes.

5. In a small bowl combine the ingredients for the glaze. Combine.

6. Remove the sides of the pan and place the cake on a wire rack with wax paper underneath. Drizzle the glaze on top of the cake and allow to cool to room temperature.